
Rewiring an auto wiring harness might sound intimidating, but it’s a manageable task for anyone with a bit of patience and the right tools. Whether you’re restoring a classic car or addressing issues with your vehicle’s electrical system, rewiring can significantly improve the overall performance and reliability of your car’s electrical components.
In this guide, we’ll walk you through the process of rewiring an auto wiring harness DIY, offering tips, techniques, and step-by-step instructions to help you complete the job successfully.
What is an Auto Wiring Harness?
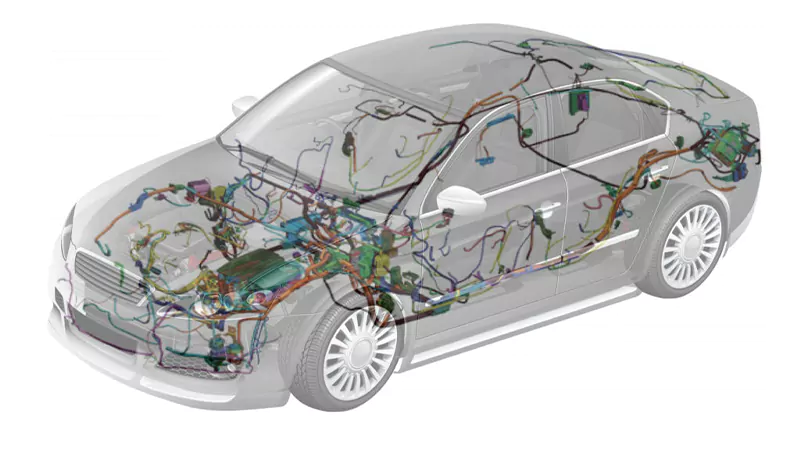
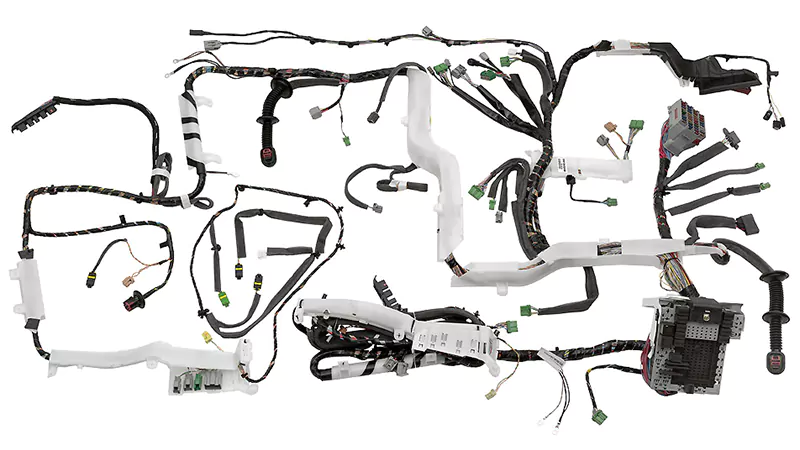
An auto wiring harness is a collection of wires, terminals, and connectors that transmit electrical power and signals to various components within a vehicle. It essentially functions as the nervous system of the car, connecting everything from the engine and battery to the lights and dashboard electronics. Over time, wiring can degrade, wear out, or become damaged due to exposure to heat, moisture, or friction. When that happens, rewiring or replacing the harness becomes necessary.
Why Rewire an Auto Wiring Harness?
There are several reasons you might consider rewiring an auto wiring harness, including:
- Faulty Connections: Corroded or damaged wiring can cause shorts, inconsistent power flow, or complete electrical failure in certain components.
- Upgrading to Modern Features: You may want to add new features to an older vehicle, such as upgraded stereo systems, lighting, or modern safety features like airbags or sensors.
- Restoring Classic Cars: For classic car restorations, rewiring is often required due to old and brittle wiring that may be causing electrical problems.
- Improving Reliability: If your vehicle is experiencing frequent electrical issues or random power failures, rewiring the harness can increase the reliability of your system.
Tools and Materials Needed for Rewiring Auto Wiring Harness
Before diving into rewiring, it’s important to have the right tools and materials. Here’s a list of what you’ll need:
- Wire Strippers and Cutters: Essential for removing insulation from wires and cutting them to the correct length.
- Soldering Iron and Solder: Used for making solid, long-lasting connections between wires.
- Heat Shrink Tubing: To insulate and protect your wire connections.
- Crimping Tools: For attaching connectors to wires.
- Multimeter: To check continuity and ensure proper electrical flow.
- Wire Loom or Ties: To organize the wires and prevent them from tangling or chafing.
- Electrical Tape: For insulation and securing wires.
- Replacement Wiring and Connectors: Ensure the wire gauge matches the specifications of your vehicle’s electrical system.
- Wire Labels or Markers: Useful for identifying wires and ensuring correct connections.
Step-by-Step Guide to Rewiring an Auto Wiring Harness DIY
Step 1: Plan and Prepare
Start by gathering all necessary tools and materials, and prepare your workspace. It’s important to have good lighting and ample space to work with. Remove the battery from the vehicle to avoid electrical shocks or accidental shorts while working.
Next, examine your vehicle’s existing wiring system. Take photos of the wiring layout or use a wiring diagram for your vehicle (often available in the service manual or online) as a reference. Label wires and components to avoid confusion later on. Knowing what goes where is crucial to ensure everything is reconnected properly.
Step 2: Disconnect the Old Wiring Harness
Now, carefully disconnect the old wiring harness from the vehicle. Begin by identifying and disconnecting the components that connect to the harness, such as the battery, alternator, lights, and sensors. Carefully remove any fasteners or clips that hold the harness in place. As you remove the wires, ensure you label each connection or take notes on where each wire goes to help with reassembly later.
Be sure to inspect the old harness for any visible signs of damage or wear. If there are specific areas of the harness that are particularly worn out, it may be a good idea to replace those sections rather than attempt a partial rewire.
Step 3: Install the New Wiring Harness
Once the old harness is completely removed, it’s time to install the new wiring harness. Begin by laying out the new harness in the same position as the old one. Make sure the wire lengths are correct and that the harness will fit snugly into its original mounting points. Route the new wiring harness through the same paths as the old one to avoid interference with moving parts, heat sources, or sharp edges.
As you route the new harness, make sure to secure it with wire ties or clips to prevent any unnecessary movement or friction. You don’t want the wires to rub against other parts of the vehicle and create wear or short circuits.
Step 4: Connect the Wires
With the new wiring harness in place, it’s time to make the connections. Use your wiring diagram to match each wire to its corresponding terminal or component. Carefully strip the ends of the wires using wire strippers, ensuring you don’t damage the wire itself. Then, either crimp connectors to the wires or use a soldering iron to make solid, permanent connections.
When soldering, apply heat to the joint and use a small amount of solder to ensure the connection is both secure and conductive. Once you’ve completed the connections, slide heat shrink tubing over each exposed wire, and use a heat gun to shrink it down, providing additional insulation and protection.
Step 5: Test the Connections
Before finalizing everything, it’s essential to test your work. Use a multimeter to check for continuity on each wire, ensuring that power will flow correctly through each connection. If you’re adding new features, such as upgraded lights or sensors, test them individually to ensure they are functioning properly.
It’s a good idea to check the system while the vehicle is off and when it’s running to ensure that everything is working correctly under different conditions. If anything doesn’t work, double-check the connections and wiring to make sure there are no shorts or loose connections.
Step 6: Secure and Insulate
After testing the wiring, secure everything in place using zip ties, wire loom, or electrical tape to prevent movement and potential damage. Ensure that all wiring is properly insulated and that there is no exposed metal that could cause shorts.
Reinstall any clips, fasteners, or covers that were removed during the disassembly process. Double-check everything to ensure that all wires are properly routed and secured.
Step 7: Reconnect the Battery and Test the System
Finally, reconnect the vehicle’s battery and conduct one last round of tests to make sure everything is functioning properly. Turn on the vehicle and test each electrical component, from the headlights to the dashboard electronics, to confirm that the rewire was successful.
Tips for a Successful DIY Auto Wiring Harness Rewire
- Take Your Time: Rewiring an auto wiring harness is not a race. Take your time to ensure every connection is correct and secure.
- Use Quality Materials: Don’t skimp on wiring and connectors. Low-quality materials can lead to electrical problems down the road.
- Follow the Wiring Diagram: Always have a clear diagram of your vehicle’s electrical system to guide you. This will help prevent mistakes.
- Test as You Go: After making a few connections, test them to ensure the system is functioning properly before continuing.
- Organize Wires: Keep your wiring neat and organized to prevent any future issues with shorts or interference.
Conclusion
Rewiring an auto wiring harness DIY can seem like a daunting task, but with the right tools, a good plan, and a bit of patience, it’s entirely possible to complete it yourself. Whether you’re restoring a classic car or upgrading your vehicle’s electrical system, rewiring can enhance both the performance and safety of your car. By following the steps outlined in this guide and taking the necessary precautions, you’ll ensure your wiring is safe, functional, and ready to perform for years to come.